


Looking to learn how to make your very own Seascrape Melt and Pour Soaps? We are thrilled to be able to share with you this exciting step-by-step guide.
Please note, for this particular soap, we did not use fragrance as we were focusing on the design element. If you feel confident enough with creating an impressive design like the one in the guide below, you can add a fragrance of your choice. Always refer to the IFRA documents for each fragrance to make sure you stay within the recommended fragrance percentage.
Please also note that we have given you a quantity range for the soap base. If you melt small quantities of melt and pour soaps, the soap base becomes solid again very quickly, which can make it trickier while pouring. You also constantly need to re-melt the soap. We, therefore, recommend that you melt more soap base than you need.
The soap design consists of 3 layers of soap. One for the “beach”, one for the “sea” and a transparent layer to finish the soap with a clean glossy effect. We recommend using rubbing alcohol between each layer to ensure that the layers adhere well together.
Please note that this soap design is aimed at intermediate soap makers.
What you’ll need:
- White soap base 200g- 300g
- Clear soap base 200g-300g
- Bronze mica 0.5g (optional)
- Gold mica 3g
- Blue mica 3g
- Silicone mould
- Fragrance – optional
- 5 plastic pots (we used old flexible yoghurt pots- we found that washing powder or ironing measuring cups work a treat as they have a beak too)
- Decorative seashells (optional)
Phase 1 – Make The Beach Soap Layer
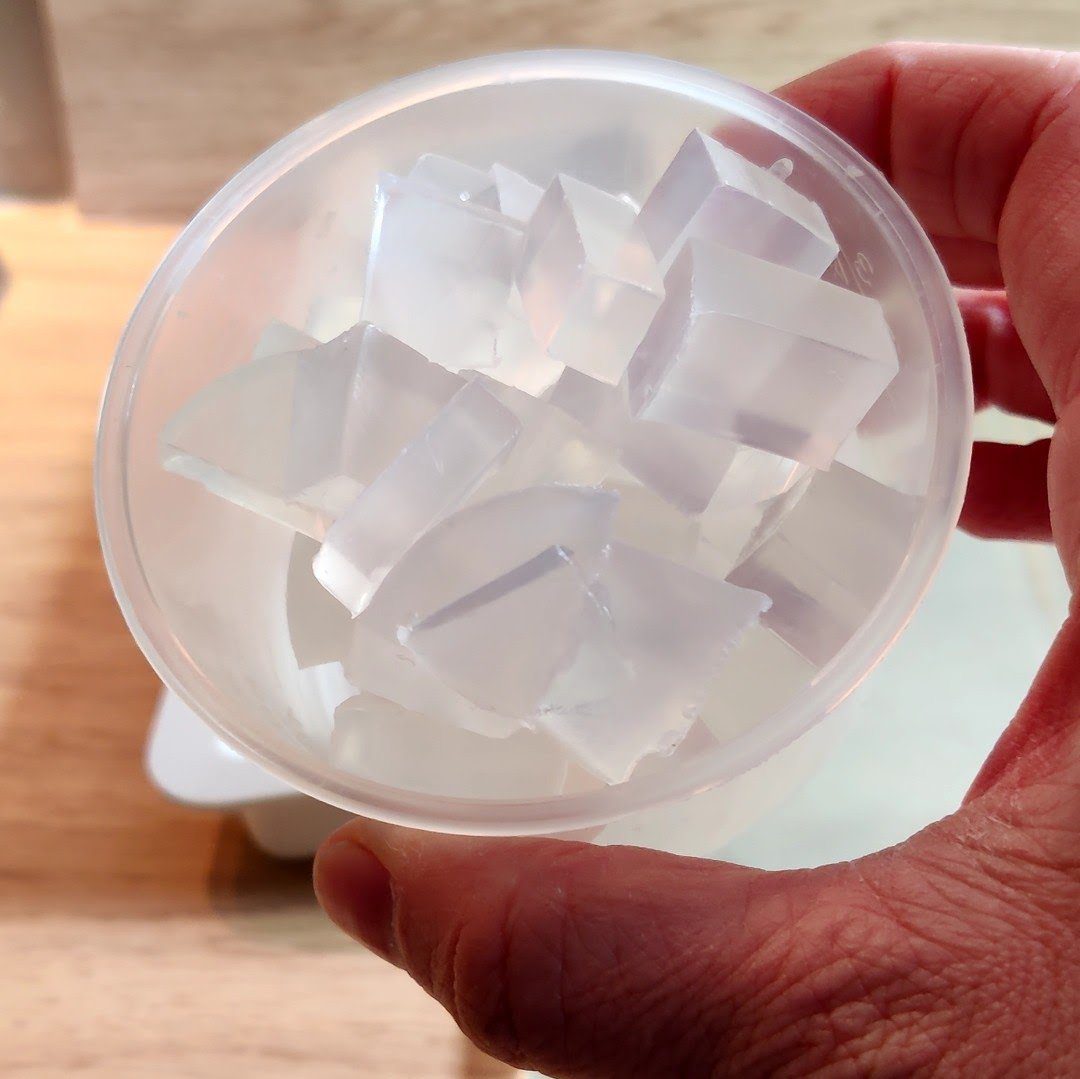
Cut your soap base in small cubes
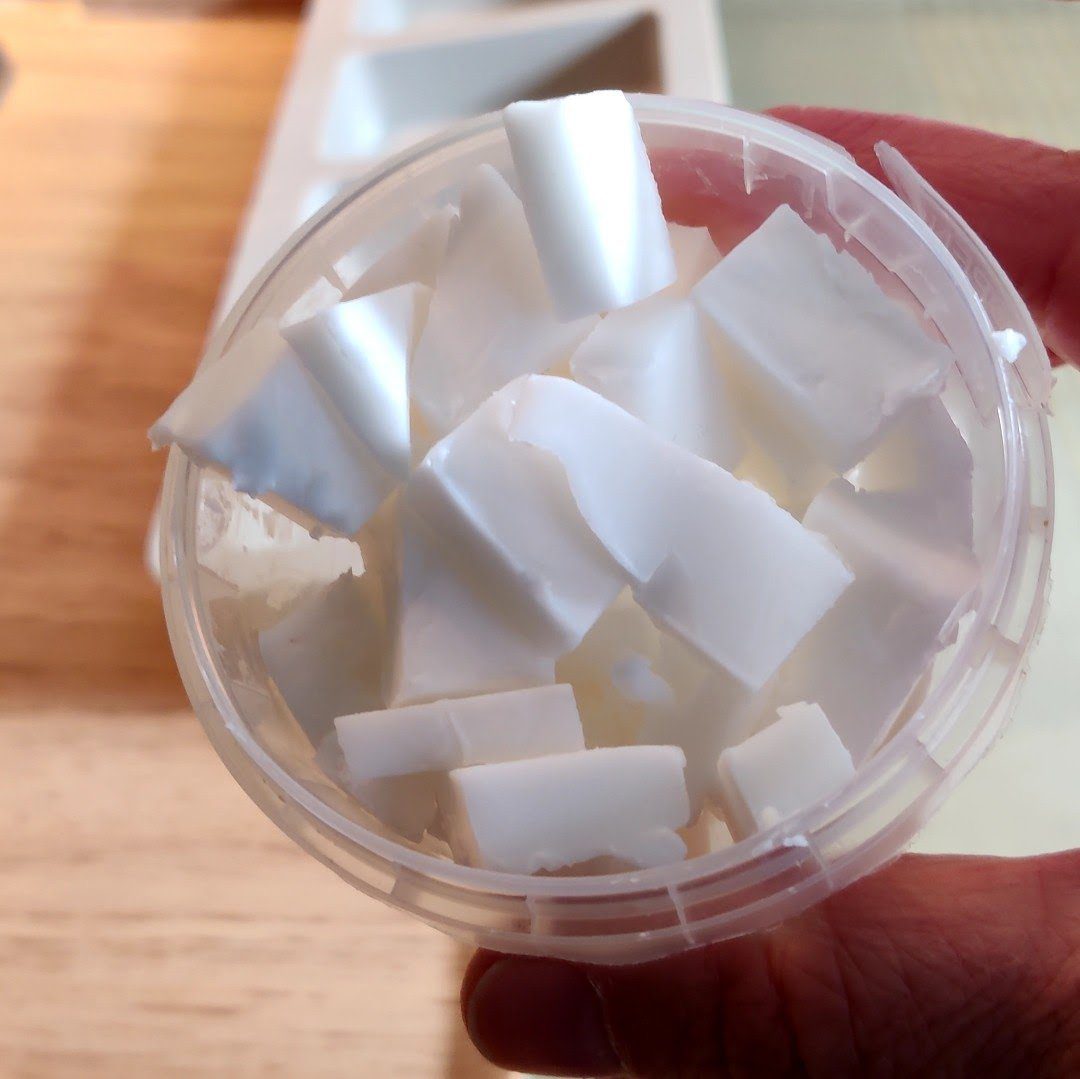
Melt approximately 150g of white soap base. This can be done in a bain marie or in the microwave. If you use the microwave method, keep a close eye on the soap melting to ensure it doesn’t overheat and start bubbling up.
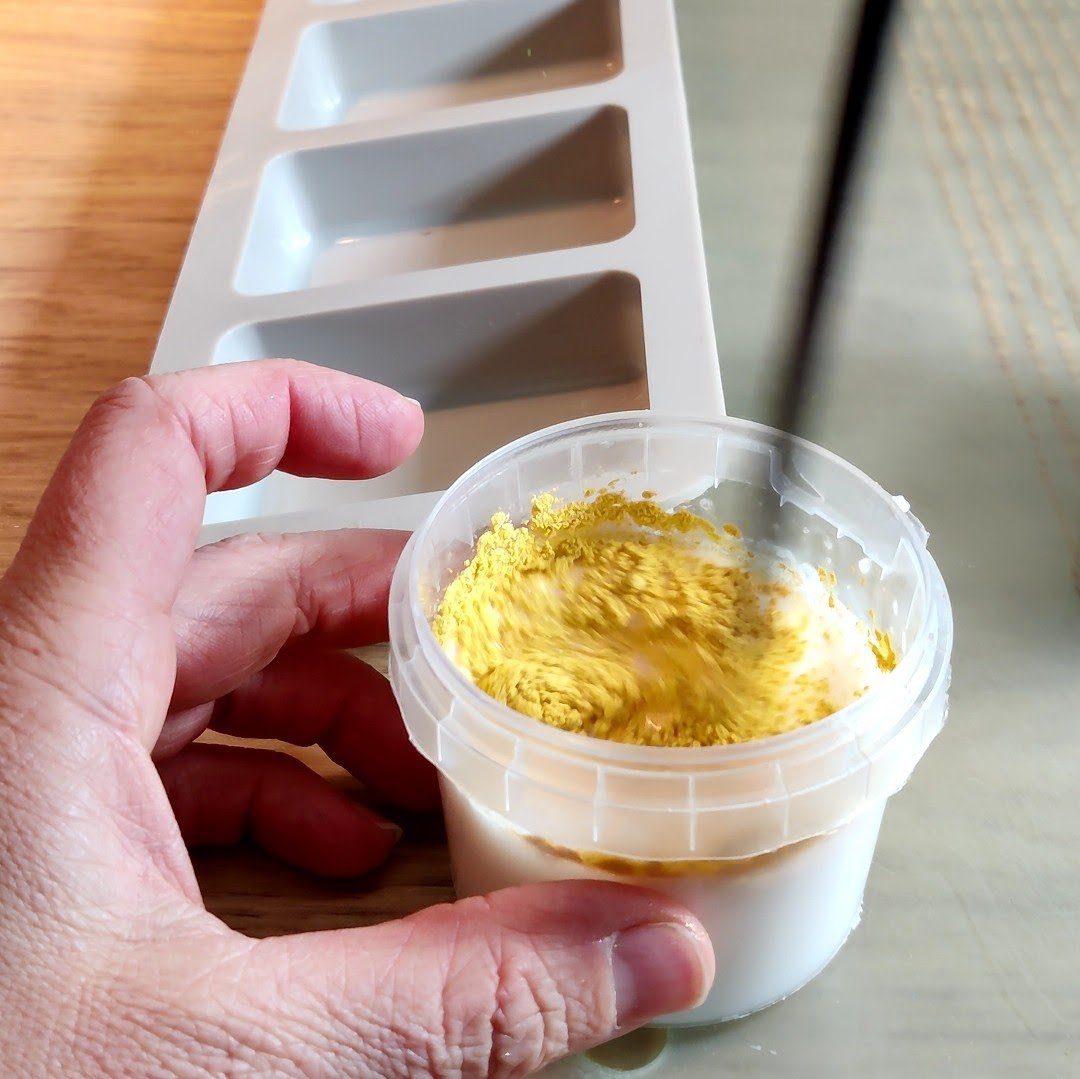
Once you’ve melted the soap base, add the gold mica and stir well. You can then also add a very small amount of bronze mica to give your beach colour a more rosy tone if you wish.
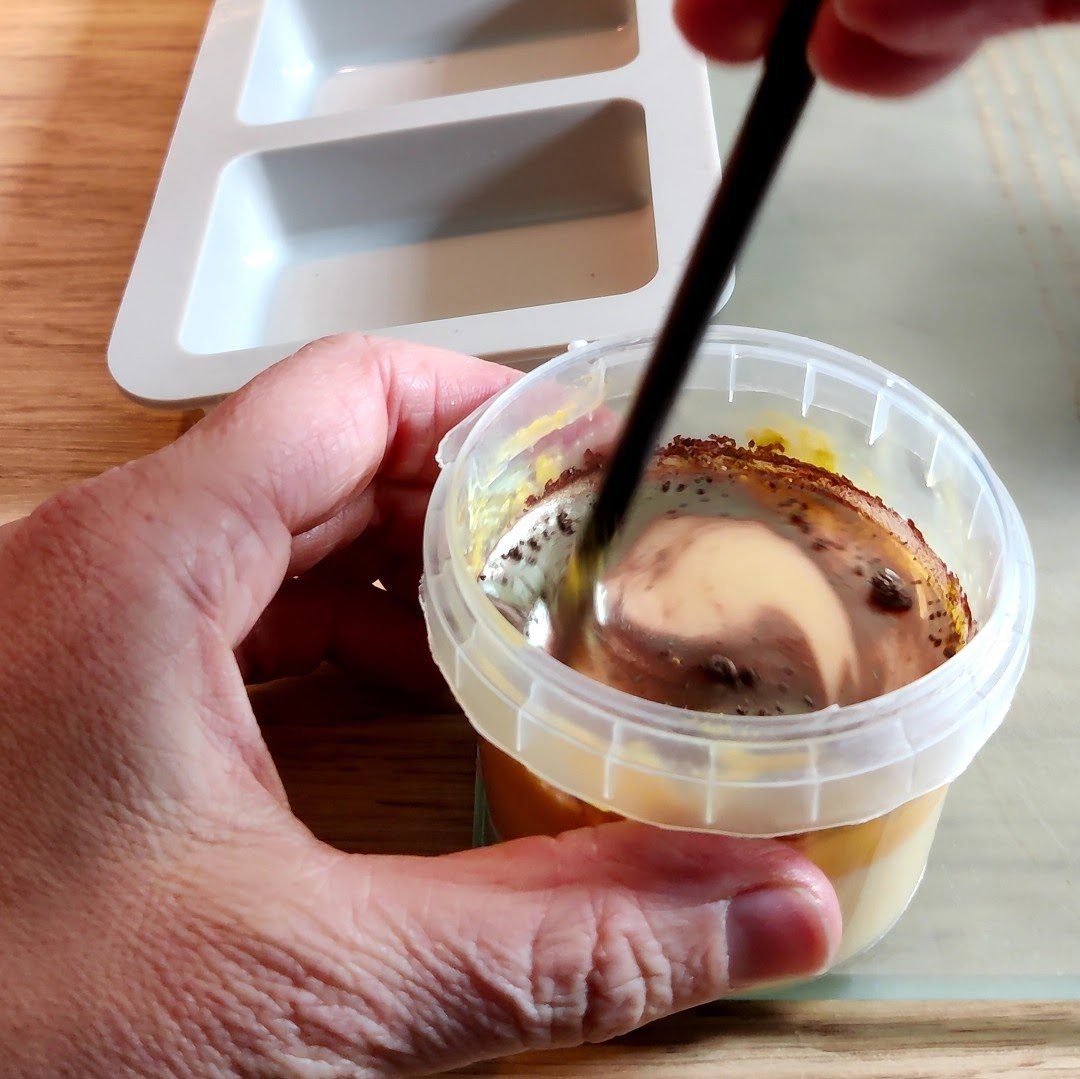
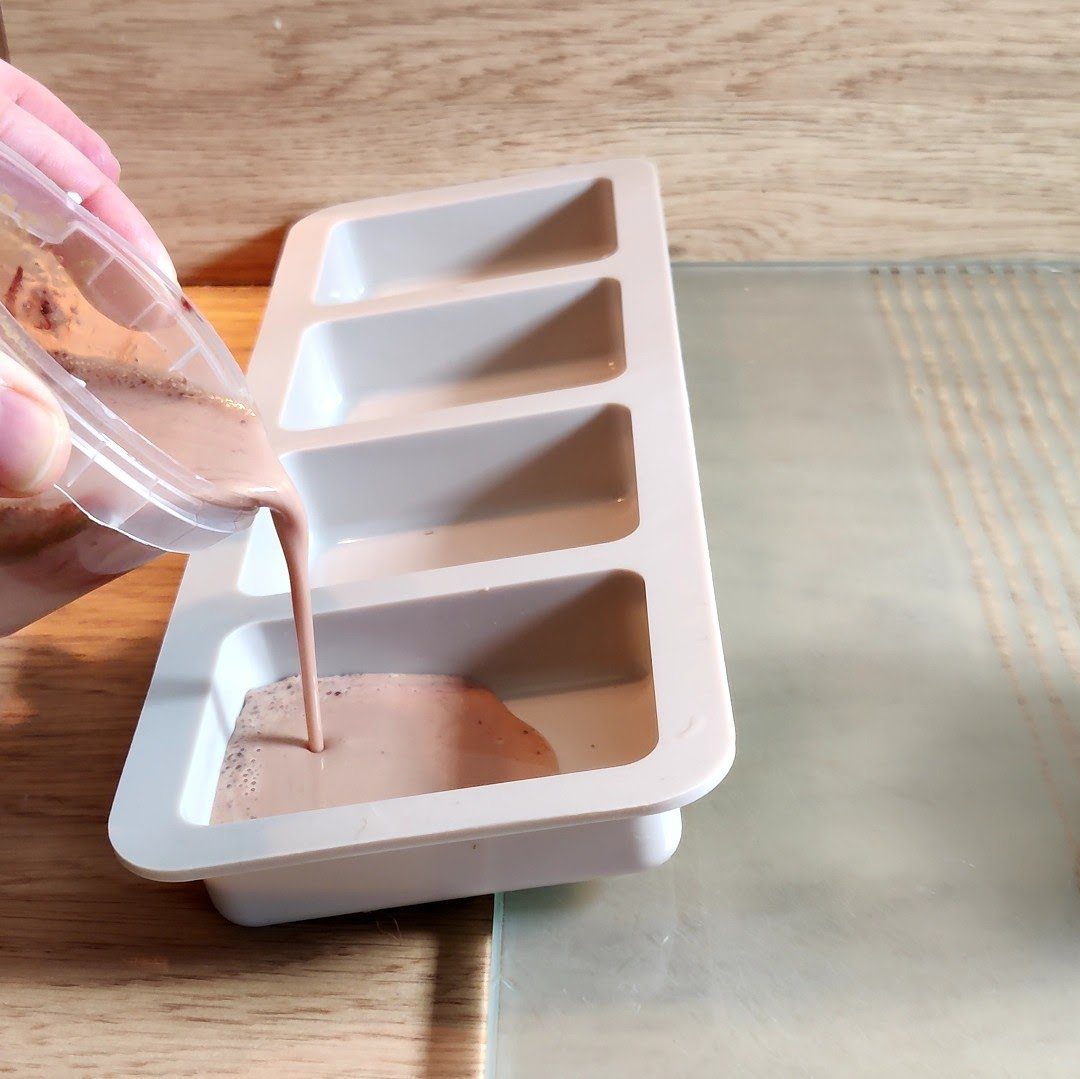
Once the mica powder has been blended in the soap, position your soap mould at a slight angle (we balanced our mould against a chopping board), and pour your soap base in the moulds in order to fill about half the moulds. Once this is done, use some rubbing alcohol to get rid of any bubbles that may have formed on the surface, and let the soap set for about 30min or until it feels hard on the touch on the surface.
Phase 2: Make The Seascape Soap Layer
Now your beach layer has set, it’s time to make your blue and white seascape layer. First of all, cut your clear soap base in small pieces in order to melt it. You’ll need approximately 150g for your blue layer.
Melt 150 g of clear soap. Once your clear soap is melted, add your blue mica. Ensure your soap is still melted and no skin is forming before pouring.
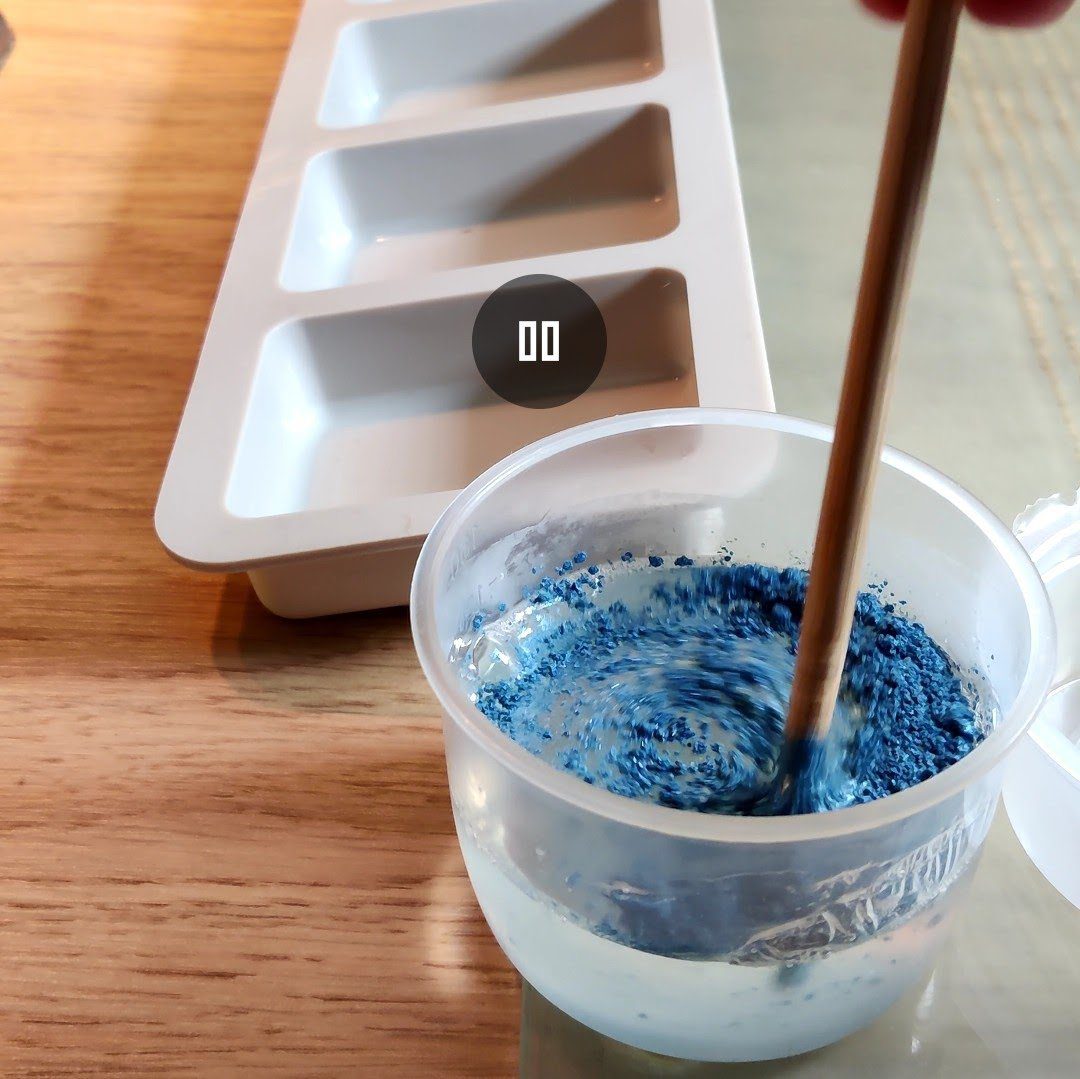
Now is also the time to also remelt your remaining white soap, as the white will be incorporated in the blue to make a wave effect. We recommend melting at least 100g of white soap so it doesn’t set too quickly and remains liquid during this phase.
You will need both blue and white soap to be poured straight after one another so you must ensure that both soap bases are still fully melted before pouring. This step is time crucial, so you must be quick so that the blue soap doesn’t form a skin layer before you pour the white soap.
Before pouring your blue and white soaps, spray some rubbing alcohol on your beach layer. This will ensure that your layers stick together.
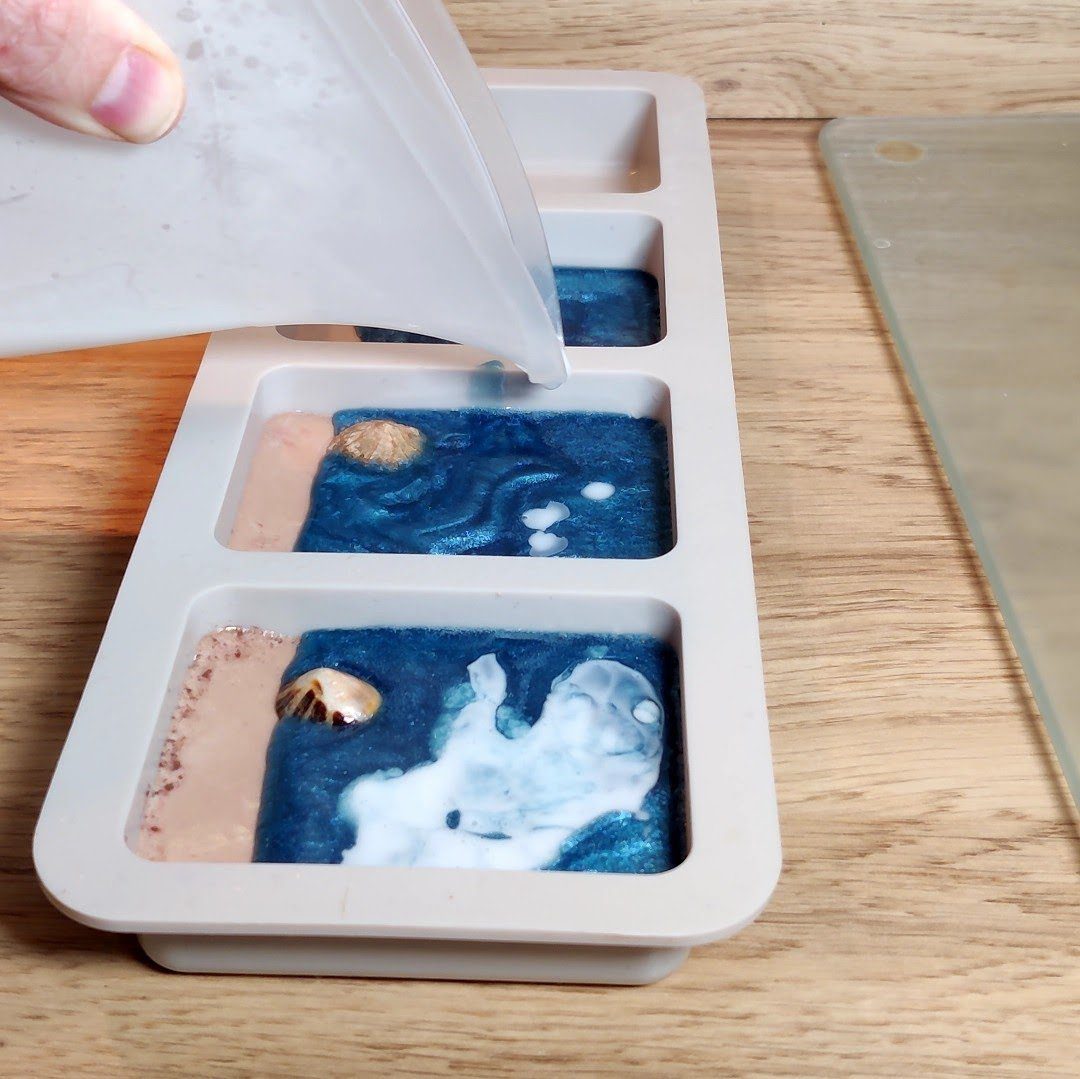
Pour the blue soap to cover the beach layer as shown on the picture below.
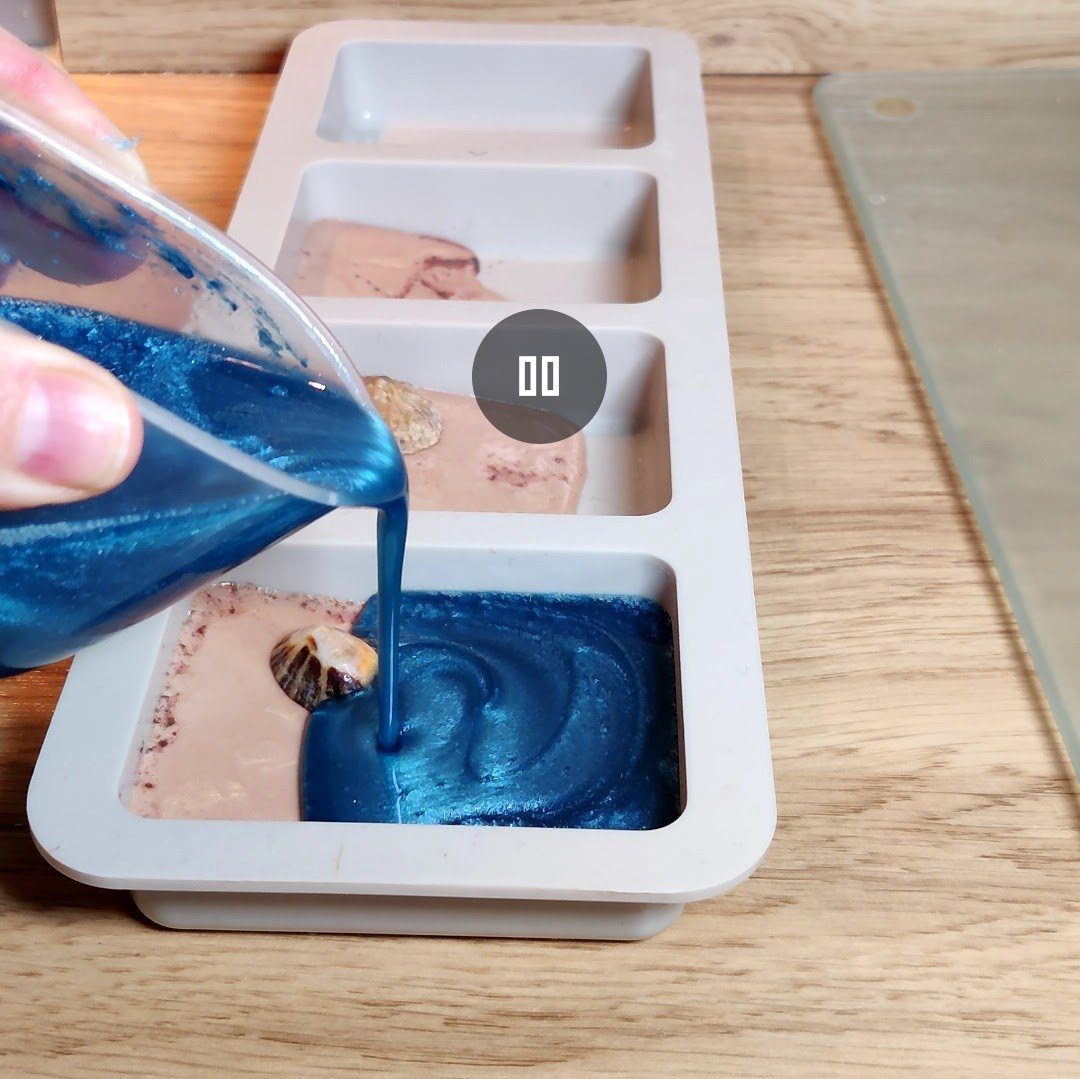
Once this is done, immediately add a small amount of white soap base in your blue soap. If you want you can also add some white at the border between your beach and your sea to make a crushing wave effect. Spay some rubbing alcohol once done with this stage to get rid of any air bubble. Leave the layer to set for approx 30 min or until hard when touching.
Note: if your blue soap has formed a skin before you had time to add the white soap, simply avoid adding the white soap. Your soaps will still look great in any case.
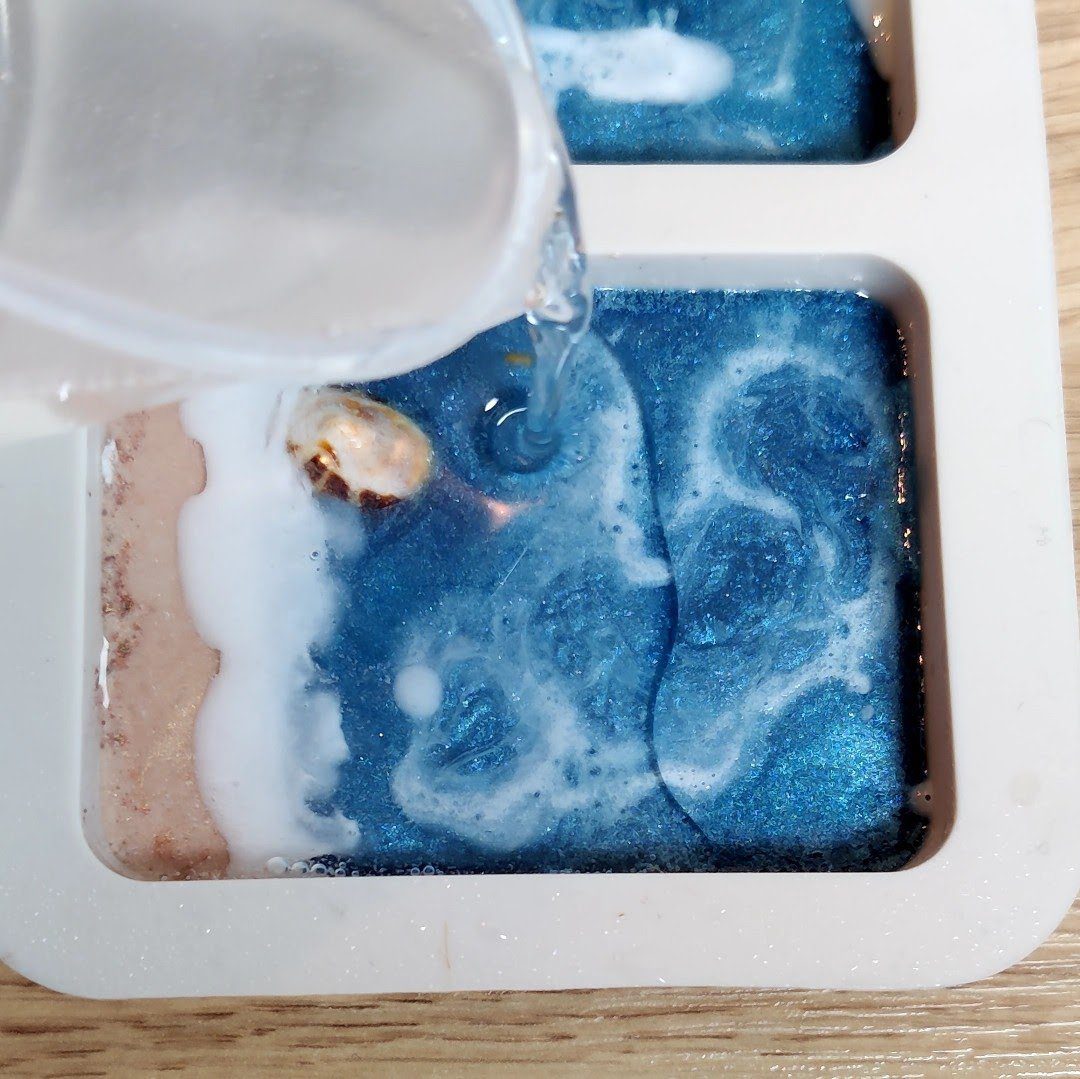
Phase 3 – Make The Clear Soap Layer
Now for the finishing touch. You’ll be adding a small coat of clear soap to finish your design with a glossy effect.
Melt the remaining clear soap. Spray it with rubbing alcohol once melted to ensure you have as little bubbles as possible in your layer, and pour enough on top of your seascape so limply cover it. This only needs to be a small layer. Once this is done, spray with rubbing alcohol and leave to set.
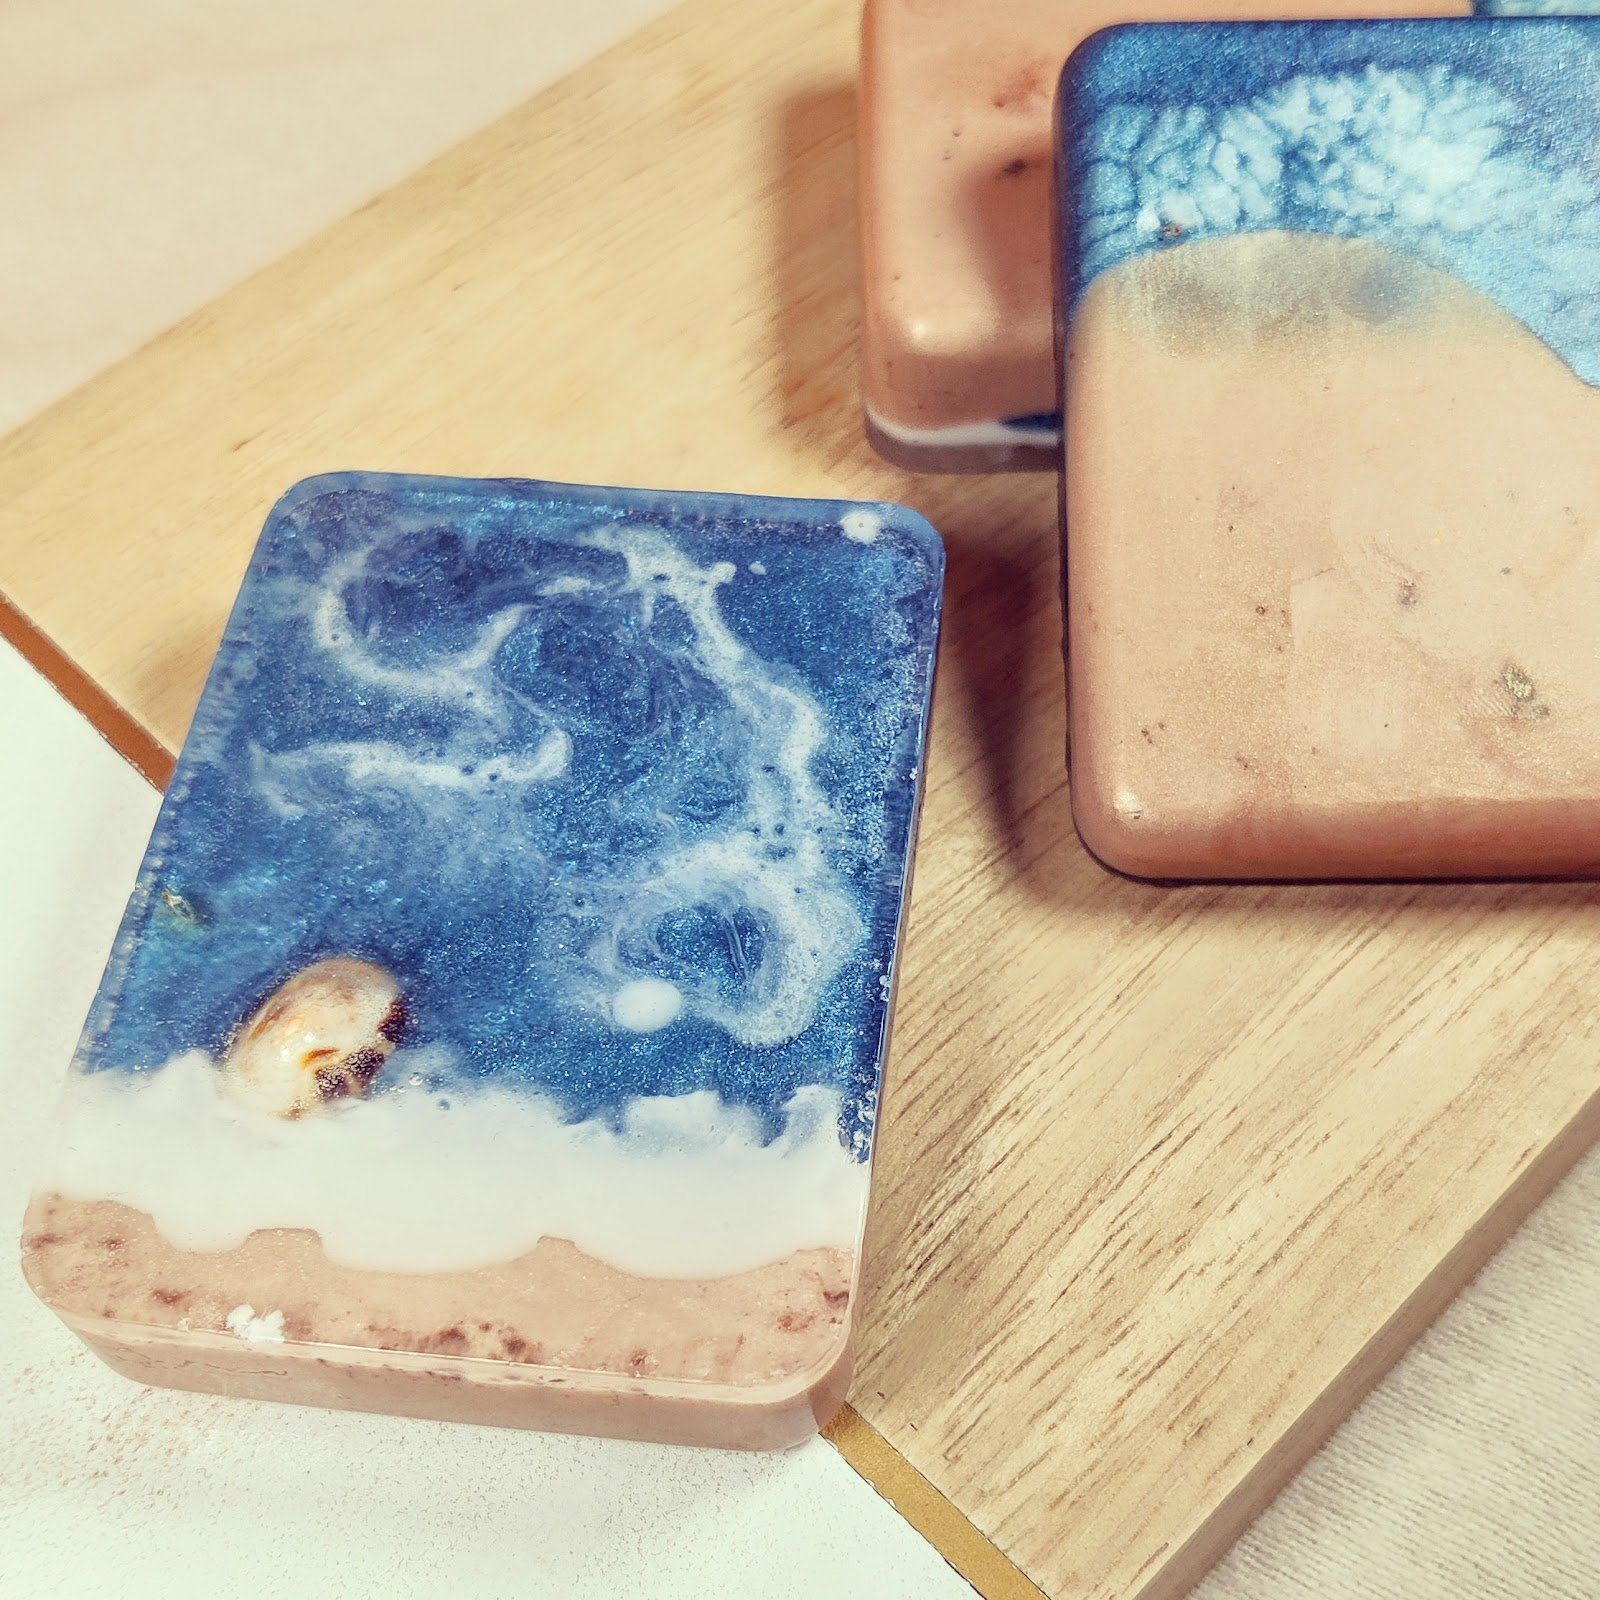
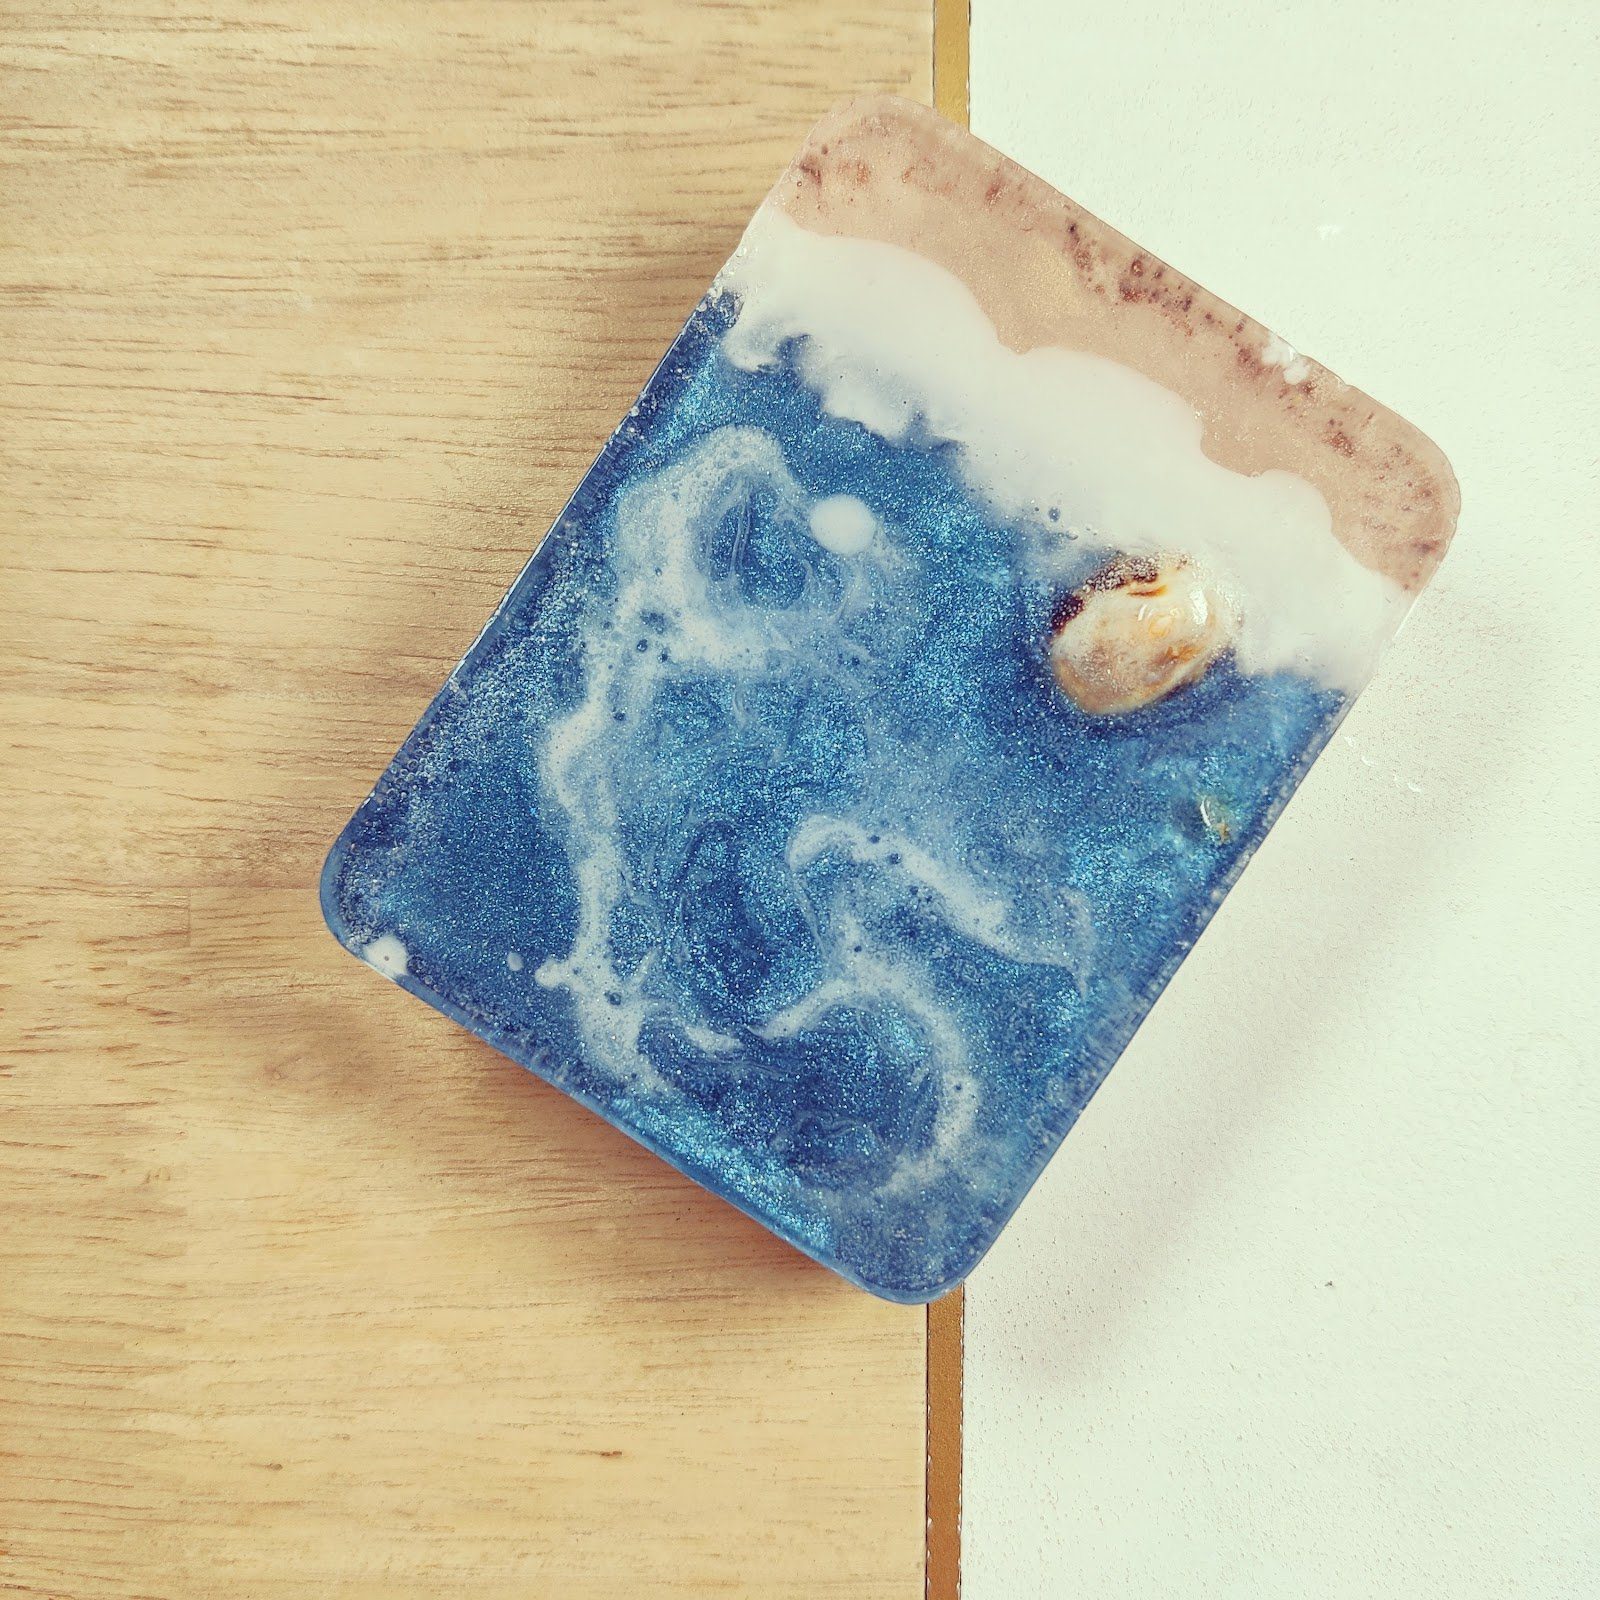
Phase 4 – Unmould Your Soaps
Leave your soaps to dry for about 4 hours, then unmould them. Your soaps are now ready to use. The patterns will look different on the top and bottom of your soaps as an added bonus.


Leave A Comment