


The very talented Victoria of Cosy and Country, has truly ‘poured her heart’ into today’s tutorial, as she will take us through one of the most popular and striking types of wax melts: the Bleeding Heart Melt.
Get a head start now and experiment with this thorough guide, have your technique and combinations just right as these will make for perfect ideas for the coming Halloween and Valentines Day.
Ingredients
- 800g KeraWax 4600 Pillar Wax
- 50ml Champagne & Roses Fragrance Oil
- 3g Bekro 30/6077 Red Candle Dye
- Wax Melt Tartlet Clamshells
- Wax Melt Mould – Hearts
- 1 x Wax Pouring Jug
- 1 x Wax Melting Jug
- Essential Wax Thermometer
- Wooden spoons
- Electric Weighing Scale
Step 1 – Measure Out The Wax
In this first step, we’ll be measuring the wax for the clamshells. As these clamshells hold up roughly 78g of wax, we’ll be rounding up and measuring 80g of wax onto a weighing scale.

Step 2 – Melt The Wax For The Clamshells
Once your wax is all measured out, it’s time to melt it. Pop it onto a medium heat, by pouring some boiling water into a pot, and then adding the melting jug en bain marie.
Let it melt it all the way through aiding the process by giving it a good stir around, as this is a small measurement of wax it won’t take too long, roughly 10 minutes.

Step 3 – Add Colour Dye
Once the wax has melted, check the temperature. We want our wax to be between 80° and 65° degrees, so if it’s above 65° degrees, simply pop the jug aside to settle for a couple of minutes.
Now, add a couple of pinches of dye and give a nice stir around while maintaining it onto a low heat, try to dissolve any blotches and let the dye melt through the wax uniformly.

Step 4 – Pour Wax Into The Clamshells
The ideal pouring temperature is around the 55° degrees mark, so, do remember to check your temperature first.
Pour into the clamshell and leave it set. You don’t need to pour with extreme precision as this wax will be chopped up later on.

Step 5 – Melt The Wax For The Heart Melts
Onto your weighing scale, measure out 400g of wax into the pouring jug and simply repeat the process. It is going to take a little longer this time as it is a bigger measurement of wax, roughly 15 minutes, also, remember to stir vigorously every now and then. Keep an eye on the melting process.

Step 6 – Add Your Fragrance Oil
If unsure, check our flashpoint guide and chart for your chosen fragrance oil’s exact flashpoint. Then, ensure that you are pouring at the ideal temperature and simply add 60ml of fragrance oil.

Step 7 – Pour Wax Into The Mould
Using a pouring jug and maintaining your wax around 55° degrees, start pouring as precisely as possible into the heart-shaped mould.
Be careful and pour only half way up into the mould, you will need the extra room to insert the ‘bloody’ centre as well as to cover it up over the top.
Leave it to set for 10 – 15 minutes, you won’t need them to settle completely yet.

Step 8 – Brake The Wax In The Clamshell
By now, the wax in your clamshell should have settled for at least 60 minutes and should be hard enough to be easily broken up.
Break it up into cubes and then further into smaller chunks by using a pastry cutter or a knife.

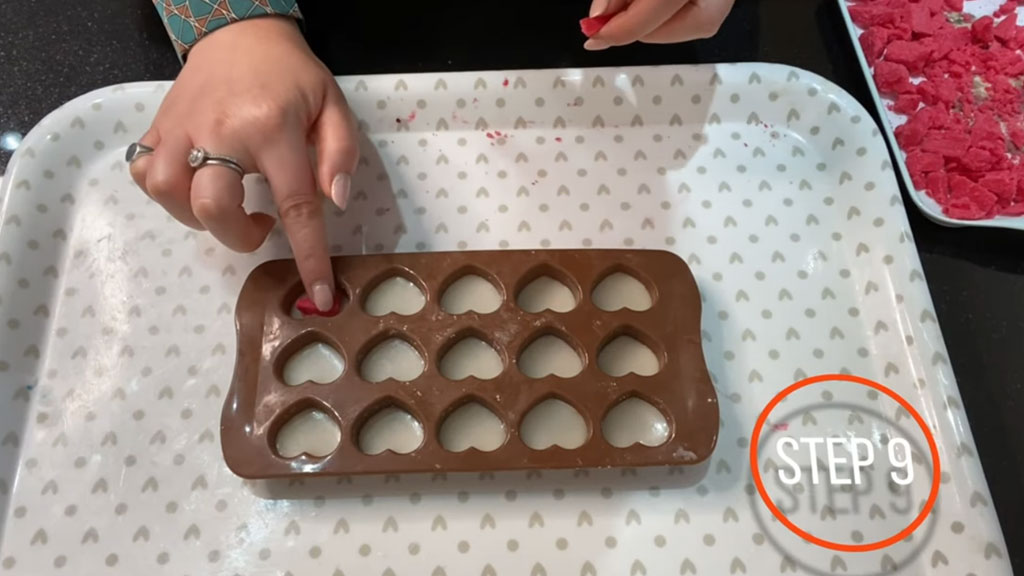
Step 9 – Position The Chunks Into The Mould
One by one, press the small red chunks into the center of the heart shape. Press hem down enough to keep them in place
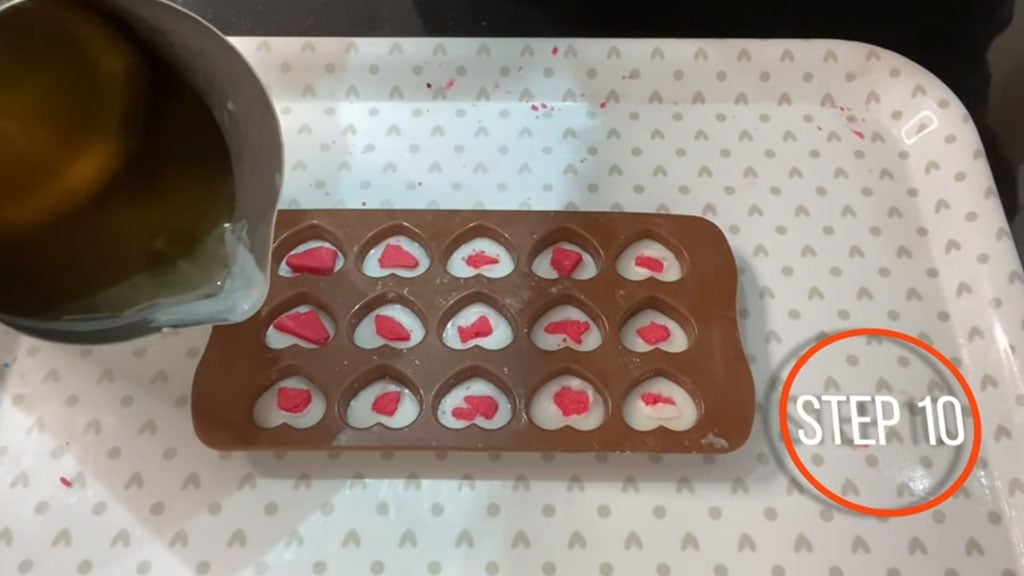
Step 10 – Position The Chunks Into The Mould
At 55° degrees, pour the wax containing the fragrance oil to conceal the hearts completely, so the final outcome and design will contain a delightful surprise in the centre of the melt.
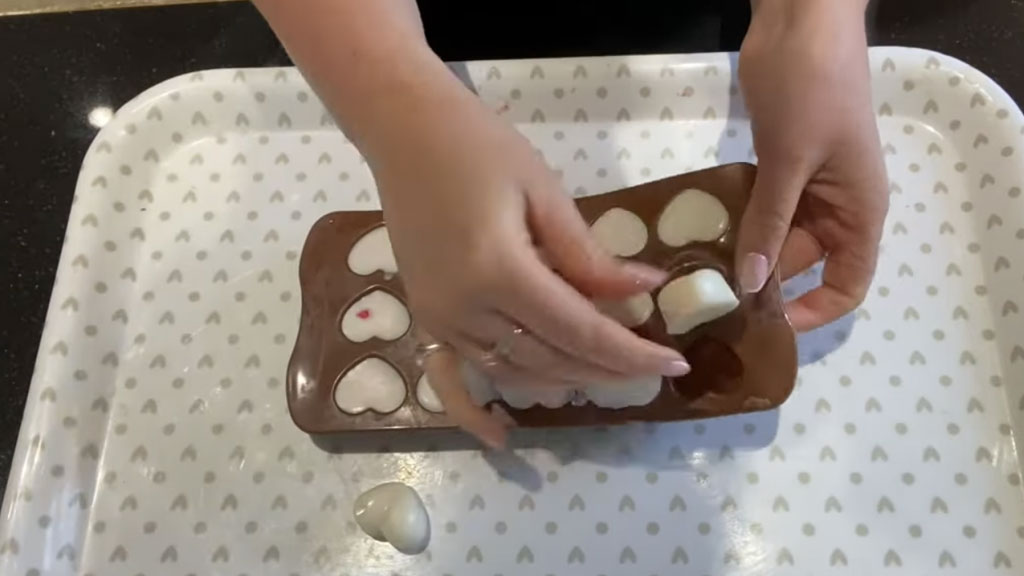
Then, leave them overnight to set, we recommend taking your time and leaving them for 24 hours.
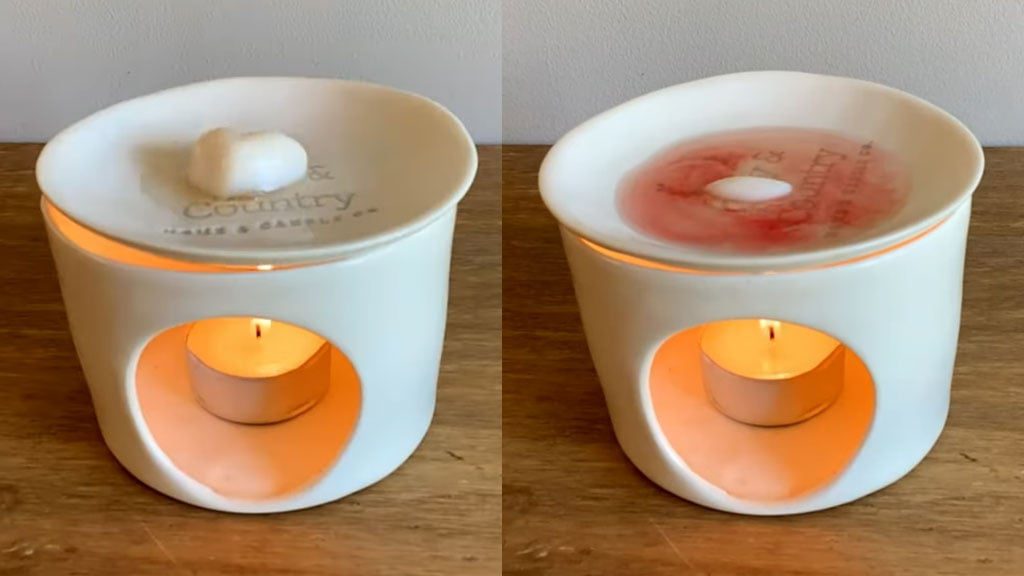
Pop Your Hearts Onto a Melter And Enjoy!
Now you’re all done. So just sit back and enjoy as these hearts slowly reveal the surprise inside!


Leave A Comment